Ingredients
Method
Prepare the Pork Belly
- Pat the pork belly dry. If there are any loose flaps or very thick uneven deposits of surface fat, trim only enough to neaten it — do not remove the skin or separate the layers. Cut the pork belly into bite-size or slightly larger serving pieces, about 4–5cm wide. Season the pieces lightly on all sides with the 2 tsp fine sea salt, garlic powder, onion powder, and black pepper. The pieces should be evenly sized so they cook and render at a similar rate. Keep the skin attached to every piece. Unlike the skin-only chicharrón, this version deliberately keeps the skin, fat, and meat all attached together — trimming too aggressively or separating any layers would lose the specific layered texture this pork belly version is built around.
Simmer to Tenderize and Start Rendering
- Place the pork belly pieces in a pot and cover with water. Add the 1 tsp salt for the simmering water. Bring to a gentle simmer and cook for 45–55 minutes, adjusting the heat so the liquid stays at a steady simmer rather than a hard boil. The pork belly is ready for the next stage when the meat is partially tender, the fat has started to soften, and the skin bends more easily but still feels intact. Drain well. Let the pieces cool until easy to handle, then pat them very dry. This simmering step cooks the pork through partway and begins rendering the fat, which makes the later frying much more controlled and helps the final texture stay crisp rather than tough. The gentle simmer partially renders the fat layer from the inside before any frying begins, which is what allows the subsequent fries to focus on finishing that rendering and crisping the skin, rather than needing to do all of that work from raw.
Dry the Pork Belly Thoroughly
- Arrange the pork belly pieces skin-side up on a wire rack set over a tray. Refrigerate uncovered for at least 4 hours, ideally overnight, until the exterior feels dry and tack-free. Before frying, pat dry once more if needed. The surface, especially the skin, should feel dry and slightly leathery rather than damp. This drying stage is one of the main factors that determines whether the skin crisps and blisters properly. Positioning the pieces skin-side up throughout this rest concentrates the drying effect specifically where it matters most — the skin is what needs to lose surface moisture most thoroughly to blister and crackle rather than staying soft or splattering violently in the fryer.
First Fry to Render and Set the Structure
- Heat enough neutral oil or lard for shallow-to-medium frying in a heavy pot to 160°C. Fry the pork belly in batches for 8–12 minutes, turning occasionally, until the fat renders further, the outside turns lightly golden, and the skin starts to tighten and blister in spots. Do not rush this stage. Remove the pieces to a wire rack and let them rest for 10 minutes. After the first fry, the pieces should be cooked through, lightly golden, and noticeably more rendered, but not yet fully crisp and deeply browned. This moderate first fry gives the substantial fat layer beneath the skin genuine time to render out fully — pushing straight to high heat here would char the skin's exterior before that fat has properly melted away, leaving chewy, unrendered fat beneath a scorched surface.
Second Fry to Crisp the Skin
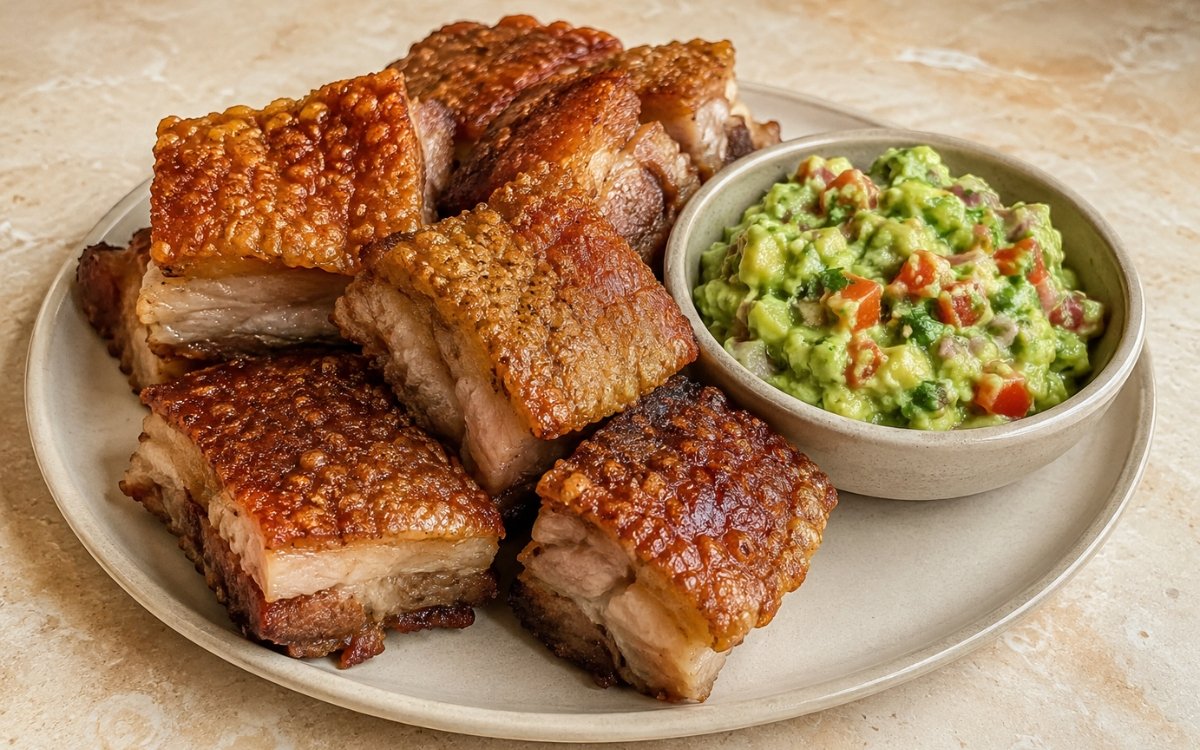
- Increase the oil temperature to 190–195°C. Fry the rested pork belly pieces a second time in batches for 2–4 minutes, until the skin becomes blistered and crisp, the exterior deepens to a rich golden-brown, and the edges look visibly crunchy. Transfer immediately to a wire rack or paper towel-lined tray and season lightly with a little extra salt while still hot. The finished chicharrón should have crisp crackling, well-rendered fat, and tender meat. The skin should sound crisp when tapped and the surface should look blistered rather than soft. With the fat already fully rendered from the first fry, this hotter second pass can move quickly and focus entirely on driving off remaining surface moisture and building the skin's genuine crackling texture, without risking the meat drying out in the process.
Make the Chunky Guacamole
- Cut the avocados in half, remove the pits, and scoop the flesh into a bowl. Add the lime juice, cumin, a pinch of salt, and black pepper. Mash lightly with a fork, keeping the mixture chunky rather than smooth. Add the red onion, jalapeño, garlic, cilantro, and green Tabasco if using. Fold gently to combine. Add the diced Roma tomatoes last and fold them in just enough to distribute them evenly. Taste and adjust with more salt, pepper, or lime juice as needed. The guacamole should stay chunky, with visible avocado pieces and clearly defined tomato, onion, and cilantro throughout. Adding the tomato only at the very end, folded in gently rather than mixed vigorously, is what keeps its pieces distinct rather than breaking down into extra liquid that would thin the whole guacamole.
Serve
- Pile the hot crispy pork belly chicharrón onto a serving plate or shallow platter. Spoon the chunky guacamole into a bowl or ramekin alongside. Serve immediately while the pork is still hot and the skin fully crisp. The crackling skin begins softening the moment it sits, especially against any ambient moisture, so serving without delay preserves the crisp-tender contrast this dish is built around.
Notes
The distinction between this pork belly version and the skin-only chicharrones elsewhere in this collection is worth understanding clearly, since the two dishes are built around genuinely different textural goals. Skin-only chicharrones are engineered to puff dramatically into something light and hollow throughout. This pork belly version instead keeps the full structure — skin, fat, and meat — intact together, aiming for crisp, blistered crackling over well-rendered fat and tender meat rather than a fully hollow puff. Treating the two techniques identically would produce a disappointing result either way.
The two-stage fry here is calibrated specifically around pork belly's layered structure rather than simply mirroring the skin-only method. The first, moderate fry exists to give the substantial fat layer beneath the skin real time to render out — this is a slower, more patient process than the skin-only version needs, precisely because there's considerably more fat and meat present to work through. Only once that rendering is essentially complete does the second, hotter fry step in to finish the skin's crisping quickly.
The brief rest between the first and second fry is a detail worth taking seriously despite how short it is. That pause lets the crust from the first fry firm up and lets residual heat redistribute through the piece, which is part of what allows the second, much hotter fry to focus purely on building crisp, blistered skin without risking the meat underneath overcooking in that final, aggressive stage.
The chunky guacamole recipe here follows the same base formula and construction logic used for the skin-only chicharrones' guacamole, which is worth noting if you've made that version before — the technique of mashing the avocado first, folding in sharper aromatics, and adding tomato only at the very end applies identically here, since the goal of a distinctly chunky, fresh guacamole doesn't change based on which chicharrón it's served alongside.