Ingredients
Method
Brown and Cool the Butter
- Melt the 150g butter in a small saucepan over medium heat. Continue cooking until the milk solids turn golden and the butter smells nutty. Do not let it burn. Remove from the heat immediately and pour into a bowl, leaving any very dark sediment behind if needed. Let the butter cool until warm but still fluid. Browned butter gives deeper flavour, but if it is too hot when added, it can deflate the batter or partially cook the eggs. That specific, watched cooling window is calibrated precisely to let the butter carry its own developed, nutty flavour into the batter without still holding enough real heat to compromise the carefully whipped egg structure still to come.
Whip the Eggs and Sugar
- In a large bowl, combine the eggs, sugar, honey, vanilla, and lemon zest. Whisk vigorously for 3–5 minutes, or use a hand mixer for 2–3 minutes, until the mixture is paler, thicker, and slightly airy. The mixture should fall from the whisk in thick ribbons for a moment before settling back in. That real, visible ribbon stage is a genuine, reliable confirmation the eggs and sugar have actually whipped in enough air and structure — this whipped foundation is directly what gives the finished madeleine its own characteristic lightness.
Add the Dry Ingredients
- In a separate bowl, whisk together the flour, baking powder, and salt. Sift or sprinkle the dry ingredients over the egg mixture in 2 additions, folding gently with a spatula after each addition until no dry streaks remain. Fold gently and stop as soon as the flour disappears. Overmixing develops gluten and makes the crumb tougher. That deliberate, gentle folding, stopped the moment the flour disappears, protects the whipped egg structure from being deflated while also preventing the batter from developing more gluten than this delicate crumb actually needs.
Incorporate the Butter
- Take a few spoonfuls of the batter and stir them into the cooled browned butter to lighten it. Then pour this butter mixture back into the main batter and fold gently until fully incorporated and smooth. The finished batter should be thick, glossy, and spoonable. Lightening the butter first helps it blend in evenly without collapsing the batter. That deliberate lightening step, stirring a small portion of batter into the dense butter before combining fully, is what lets the two mixtures actually match in consistency — pouring the butter straight into the full batter would risk it sinking and deflating the delicate, airy structure already built.
Rest the Batter
- Cover the batter and refrigerate for at least 1 hour, preferably 8–12 hours. Resting is one of the keys to a proper madeleine. The cold batter hitting a hot oven helps create la bosse — the characteristic hump. That genuine temperature contrast, cold batter against a fully hot oven, is exactly what drives the rapid, dramatic rise responsible for the madeleine's own signature raised hump.
Prepare the Pans
- Use two 12-shell standard madeleine pans, or bake in batches if using one pan. Brush each cavity lightly but thoroughly with the melted butter, getting into all ridges. Dust lightly with flour, then tap out the excess. Refrigerate the prepared pans for 10–15 minutes if your kitchen is warm. A properly greased and lightly floured pan helps the shell pattern release cleanly and stay defined. That thorough, deliberate coating into every ridge is what protects the finished madeleine's own defined shell pattern once it's unmolded — any missed spot would risk the batter sticking and tearing that same detail away.
Fill the Molds
- Preheat the oven to 220°C / 425°F. Spoon or pipe the cold batter into the center of each cavity, filling each about ¾ full. Do not spread it to the edges; it will spread in the oven. For standard-size molds, this is usually about 1 generous tablespoon batter per cavity. Overfilling reduces definition and may cause overflow; underfilling gives shallow shells and a smaller hump. That specific fill level gives the batter genuine room to spread naturally into the mold's own shell shape as it bakes, rather than being forced there by hand or overflowing past the cavity's own edges.
Bake
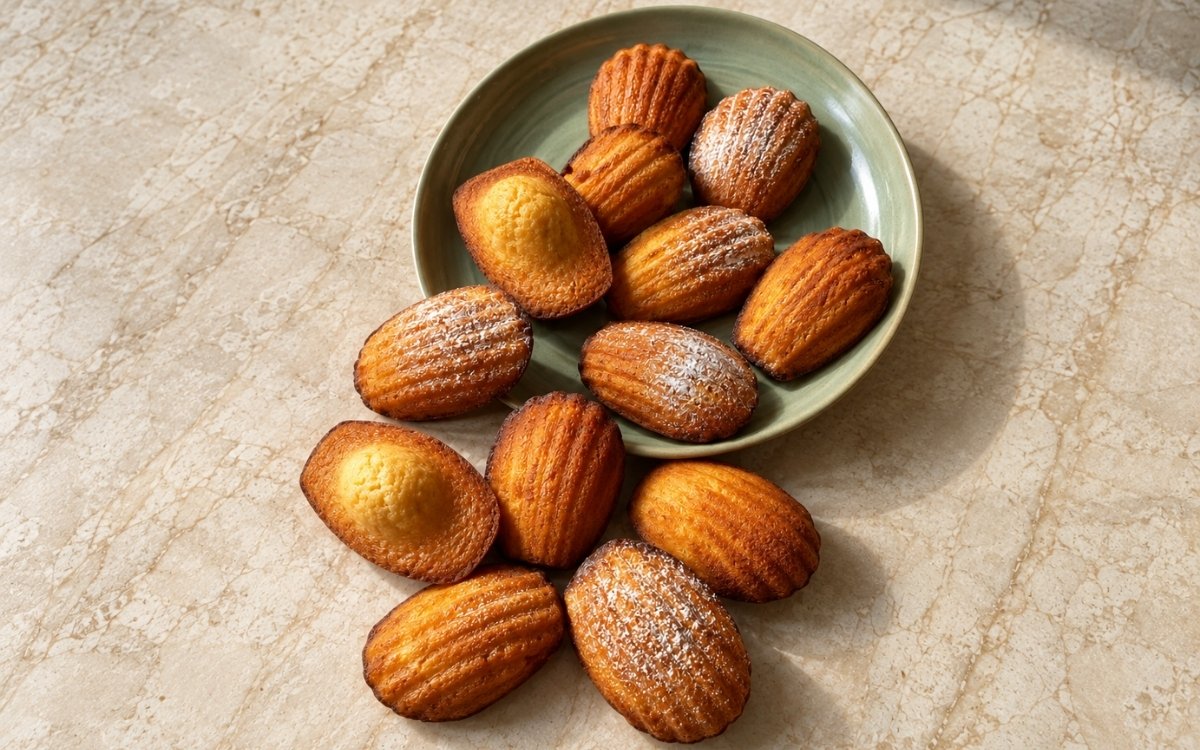
- Bake at 220°C / 425°F for 3 minutes, then without opening the oven reduce the temperature to 190°C / 375°F and bake for 5–7 minutes more, until the centers are springy, the edges are deeper golden-brown, the ridged shell side is well colored, and the flat side has a clear hump. If baking one tray at a time, keep the remaining batter chilled. The madeleines are done when they spring back lightly when touched and the edges are just a bit darker than the center. Do not overbake. Overbaked madeleines dry out quickly and lose their delicate texture. That initial burst of high heat, followed immediately by a lower temperature without ever opening the door, is what drives the fastest possible early rise while still letting the interior finish baking through gently afterward.
Unmold and Cool
- Immediately turn the madeleines out onto a wire rack or a clean towel. Let cool for a few minutes. If desired, dust a few lightly with powdered sugar once just warm or fully cool. That immediate unmolding, right off the hot pan, protects the madeleines from continuing to steam and soften against the retained heat of the metal cavities.
Notes
Resting the batter for a genuine minimum of 1 hour, ideally a full 8 to 12 hours, deserves genuine recognition as the technique most directly responsible for whether these madeleines develop their signature hump. The recipe's own explicit note that "the cold batter hitting a hot oven helps create la bosse" reflects a real, essential mechanism — that dramatic temperature contrast is specifically what drives the rapid rise this classic shape depends on.
Cooling the browned butter until warm but still fluid, rather than incorporating it while still hot, deserves the same attention this technique receives throughout this collection's other browned-butter batters. The recipe's own explicit warning that butter added too hot "can deflate the batter or partially cook the eggs" reflects a real, narrow window this step depends on watching closely.
Filling each mold cavity to a specific, deliberate ¾ level, rather than filling it fully or sparingly, deserves genuine attention as a real, checkable technique. The recipe's own explicit distinction — overfilling reduces definition, underfilling gives a smaller hump — reflects real understanding of how directly this one detail affects the finished shell's own shape and definition.
Baking at an initial high temperature, then reducing it without ever opening the oven door, deserves respect as a deliberate two-stage technique specific to this pastry's own needs. That combination drives the fastest possible early rise while still allowing the interior to finish baking through gently afterward, without the temperature shock a door-opening would introduce.