Ingredients
Method
Roast and Blend the Salsa Roja
- Heat a dry skillet or comal over medium-high heat and add the 4 Roma tomatoes, the 2 unpeeled garlic cloves, and the ¼ white onion. Turn them as needed for 8–10 minutes, adding dried chiles for the final minute so they toast without scorching, until the tomatoes are softened and blistered, the onion has charred spots, and the garlic is fragrant and soft. Peel the garlic, then blend everything with ½ tsp salt and 1 tsp oil until smooth or slightly textured, adding water 1 tbsp at a time only if the blades stall. Taste and adjust the salt; the salsa should be spoonable and concentrated, not watery. That concentration is what lets a small drizzle flavour the whole taco without wetting the tortilla.
Prep the Filling Components
- Pat the 700g beef very dry with paper towels, because wet meat steams instead of searing. Season it with 1½ tsp kosher salt, 1 tsp black pepper, ½ tsp cumin, and ½ tsp oregano, then toss with the Worcestershire sauce and optional soy sauce just before it goes into the pan. Slice the onion and both bell peppers into strips of roughly similar width so they soften at the same pace, and cut the bacon into small strips. Shred the 200g cheese and keep it beside the stove, since alambre comes together quickly once the meat is seared. That advance prep is what lets the last stages run in minutes without anything overcooking.
Render the Bacon
- Heat a large heavy skillet, plancha, or cast-iron pan over medium heat and add the 200g bacon. Cook for 6–8 minutes, stirring now and then, until the fat has rendered and the bacon is browned and lightly crisp at the edges but not brittle. Lift the bacon out with a slotted spoon onto a plate, leaving 1–2 tbsp of rendered fat in the pan and discarding any excess if there is a lot. That measured amount of fat is what gives the beef and vegetables a smoky cooking medium without leaving the finished filling greasy.
Sear the Beef
- Raise the heat to medium-high or high until the beef sizzles the moment it lands in the pan. Add the seasoned beef in a single layer, working in 1–2 batches if needed, since overcrowding drops the pan temperature and prevents browning. Leave it undisturbed for 1–2 minutes, then toss and keep cooking for about 3–5 minutes total, depending on the cut and the size of the pieces, until browned with charred edges but still juicy. Move the beef to a plate and do not push it further, because it returns to the pan later. That brief, fierce sear is what builds the crust while the centre stays tender.
Blister the Vegetables
- In the same pan, add the sliced onion and both bell peppers, with a small splash of the 1 tbsp oil only if the pan looks dry. Cook over medium-high heat for 5–7 minutes, stirring occasionally, until the onions soften and the peppers are tender but not collapsed, with caramelised edges and some blistering. Add the 2 chopped garlic cloves for the final 30 seconds, just until fragrant. Leave the vegetables unsalted at this stage, since early salt draws out water and makes them steam. That restraint is what keeps the vegetables sweet and shapely instead of limp.
Combine and Melt the Cheese
- Return the beef, with any juices from the plate, and the bacon to the pan with the vegetables. Toss everything over medium heat for 1–2 minutes so the flavours combine and the juices coat the mixture, and if liquid has pooled, cook 1–2 minutes longer uncovered over medium-high heat. Taste and add a pinch of salt only if needed. Spread the filling out slightly, scatter the 200g shredded cheese over the top, cover for 30–60 seconds until it melts, then gently fold it through until the mixture is cohesive and glossy but not greasy or wet. That folded, just-melted cheese is what binds the filling instead of forming a heavy separate layer.
Warm the Tortillas
- Warm the 12 corn tortillas on a dry skillet or directly over a gas flame for a few seconds per side, until soft and pliable with a few light toasted spots. Stack them in a clean kitchen towel as they come off so they stay warm and steam gently in their own heat. Do this just before serving, because tortillas warmed too early cool, stiffen, and tear. That quick warming is what stops the corn from cracking when the tortilla is folded around the hot filling.
Assemble and Serve
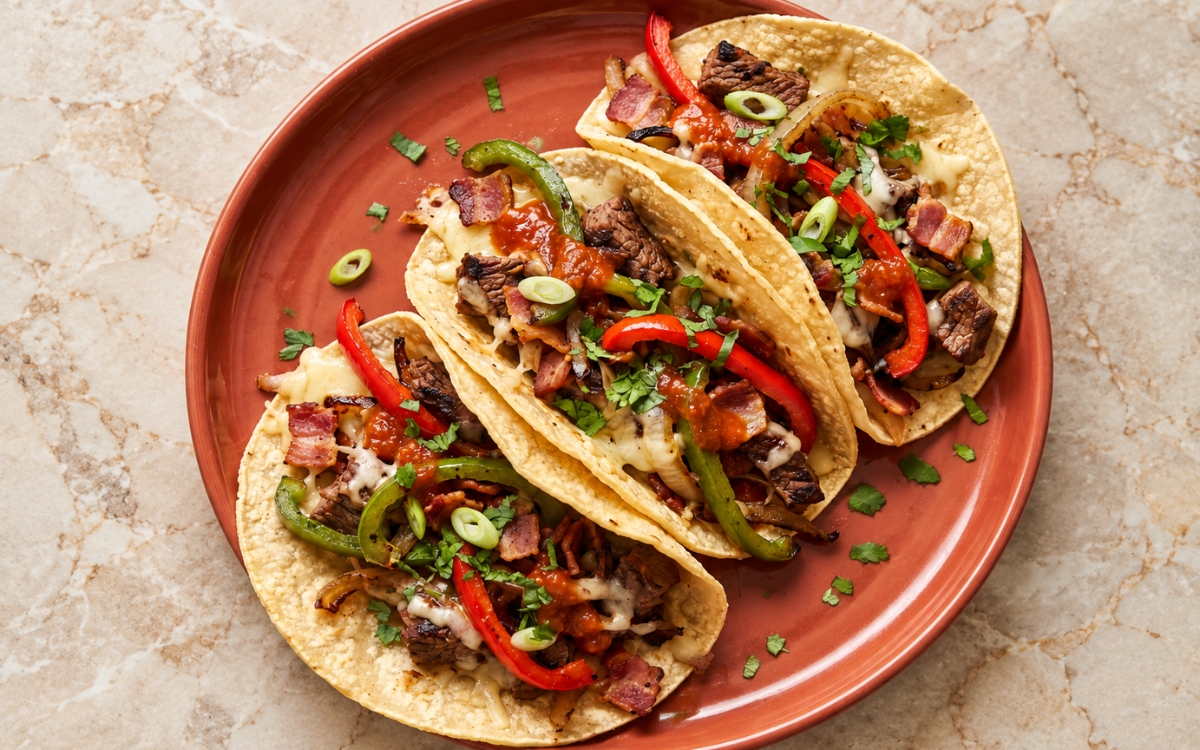
- Divide the alambre filling among the 12 tortillas, about 3 tacos per serving, mounding it so the beef, bacon, peppers, and cheese stay clearly visible. Spoon a small drizzle of salsa roja over each taco without over-saucing, then finish with the 3 tbsp chopped cilantro and the sliced scallions. Serve immediately with lime wedges so everyone can squeeze over their own. That light hand with the salsa is what keeps the tortillas intact and the filling at the centre of every bite.
Notes
Patting the beef completely dry and searing it in a single layer deserves genuine recognition as the technique most directly responsible for whether the tacos taste charred or boiled. Surface moisture and a crowded pan both drop the temperature and force the meat to steam in its own juices, so it turns grey and tough instead of developing a browned crust.
Sequencing the heat — bacon over medium, beef over high, vegetables over medium-high — deserves the same attention this technique receives throughout this collection’s other seared and stir-fried dishes. Each ingredient needs a different intensity to finish well, so one constant flame either scorches the bacon, undercooks the crust on the beef, or leaves the peppers soft and pale.
Using salsa roja only as a finishing drizzle deserves genuine respect as the detail most directly responsible for a taco that stays juicy but never soggy. Cooked into the filling, the sauce would flood the pan and soak the corn tortilla, whereas a spoonful on top adds smoky heat and acidity while the beef, bacon, and cheese stay in focus.
Checking the pan for pooled liquid before the cheese goes in deserves attention as a genuine, checkable readiness cue rather than a loose approximation. If juices are collecting around the filling, cooking it uncovered for another 1–2 minutes over medium-high heat reduces them, so the cheese melts into a glossy, cohesive mixture instead of dissolving into a wet pool.