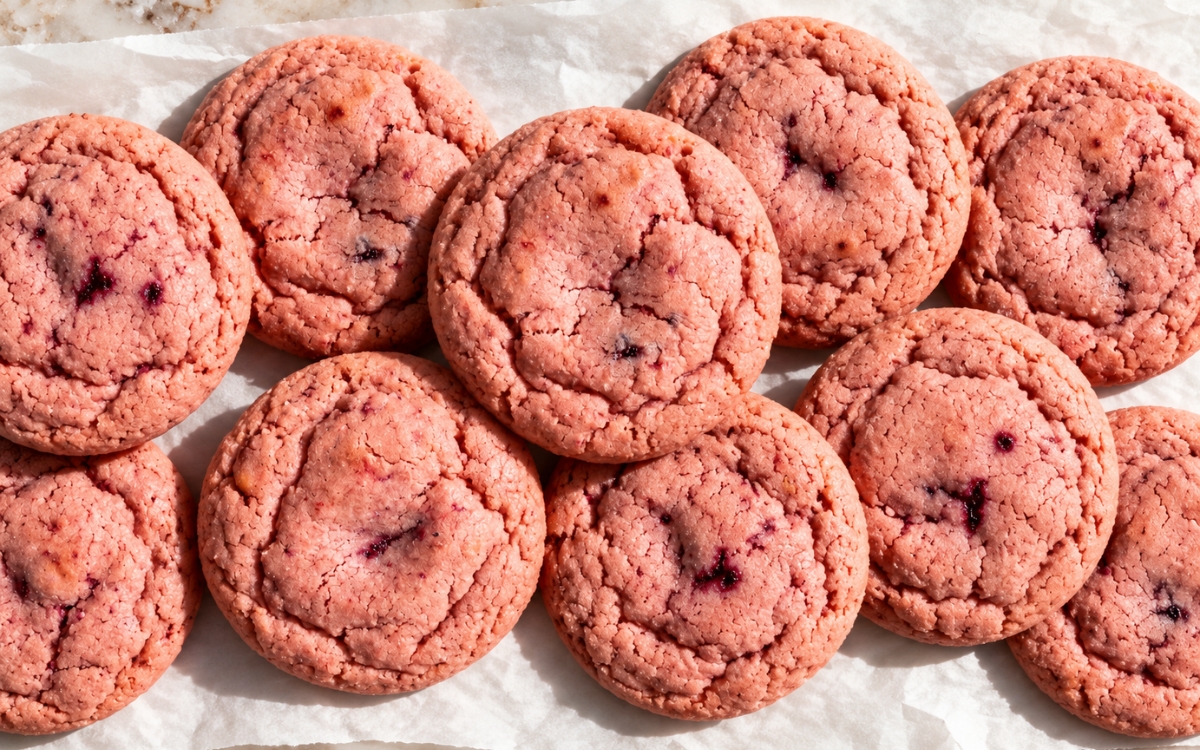
Ingredients
Method
Prepare the Strawberry and Hibiscus
- Grind the freeze-dried strawberries for the dough into a fine powder and measure out 25 g, then separately crush another 15 g into small flakes for visible berry spots. Finely grind the dried hibiscus and sift it so no hard, fibrous bits remain. This step matters for even color and smooth texture throughout the dough.
Mix the Dry Ingredients
- Whisk together the flour, cornstarch, strawberry powder, ground hibiscus, baking powder, baking soda, and salt in a medium bowl until fully combined, breaking up any pink clumps well so the dough colors evenly.
Cream the Butter and Sugar
- Beat the butter and 220 g sugar together in a large bowl for 2 to 3 minutes until creamy, smooth, and slightly lighter in color. Don't overwhip to a fluffy, frosting-like texture — too much air incorporated here can make the cookies spread too much and lose their thick, chewy centers.
Add the Wet Ingredients
- Beat in the egg, then the egg yolk, then the vanilla, mixing until fully emulsified and glossy, scraping the bowl well. The mixture should look smooth with no separated butter visible.
Finish the Dough
- Add the dry ingredients and mix on low just until no dry flour remains, then fold in the crushed freeze-dried strawberry flakes at the end so they stay visible as darker berry-toned spots. The dough should end up soft but scoopable and evenly rosy pink.
Portion and Chill
- Scoop the dough into 24 equal portions, about 30–32 g each, rolling each lightly into a ball before coating it in the granulated sugar. Arrange on a parchment-lined tray or plate and chill for 1 hour, until firm. Chilling is critical here — it controls spread, keeps the cookies thick, and improves the wrinkled, crackled surface once baked.
Bake
- Heat the oven to 175°C conventional / 160°C fan and line baking trays with parchment. Place the chilled dough balls on the trays with enough space between them, about 6 to 8 per tray, and bake for 10 to 12 minutes, until the edges are set, the tops are puffed and softly crackled, and the centers still look slightly underdone and soft. Don't overbake — these cookies shouldn't brown much, since they're meant to keep their pink tone and finish setting on the hot tray.
Cool and Set
- Let the cookies rest on the tray for 8 to 10 minutes — this carryover time firms the edges and keeps the centers chewy. Transfer to a rack to cool completely, and the tops will settle into their soft, crackled finish as they cool.
Notes
Freeze-dried strawberries, rather than fresh or frozen, are the only option that works for this dough's texture. Fresh or frozen berries introduce moisture that fresh fruit always carries, and that extra liquid causes the cookies to spread unevenly and lose the thick, chewy structure the recipe depends on.
Grinding and sifting both the strawberry powder and the hibiscus separately, rather than skipping straight to mixing, protects the dough from two different problems at once. Unground hibiscus pieces in particular can leave a gritty texture, since dried hibiscus petals are noticeably more fibrous than most other dried fruit powders.
Chilling the portioned dough for the full hour isn't a step to shorten even under time pressure. That chilling period is what controls how much the cookies spread in the oven, and it's directly responsible for the thick, soft, crackled tops rather than a thinner, flatter result.
Resisting the urge to bake until the cookies show real browning matters more here than in a typical sugar cookie. These are meant to keep their rosy-pink color, and any real color change from baking usually means they've gone past the point where the centers would have stayed soft.